Monday, January 31, 2011

from scratch


Hershey's "perfectly chocolate" chocolate cake cupcakes, with homemade buttercream

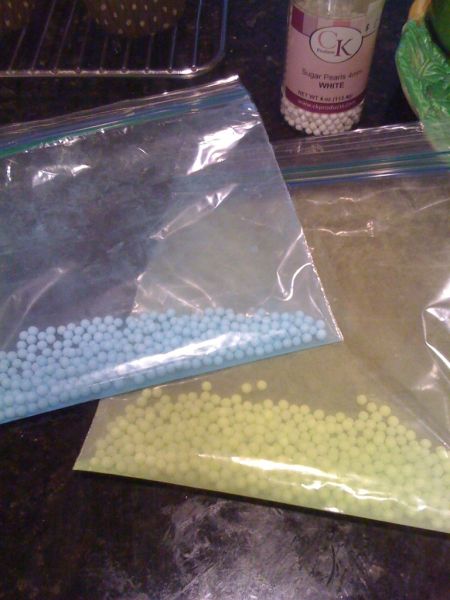
This is my first cupcake that has been baked from scratch, cake and frosting! I even colored the little pearls with silver dusting powder. I did a lot of research and read a lot of chocolate cake recipes but this Hershey's one was the one that had the best reviews. I have to say that I was a little worried because the batter turned out really runny and thin, but on the recipe it does state that it will turn out that way so I went ahead. I was also a little apprehensive on making my own buttercream, I really thought I was going to fail big time, but I didn't! I'm glad I did it cause they turned out sooooo good! I had friends and the boyfriend taste test it, friends loved it! The boyfriend proposed...ok so he was just kidding but really he loved them :)

My dad asked me the other day what all the baking and cooking is about and I said I HAVE NO IDEA! I've gotten the domestic bug or something, but it's so fun and really makes the day go by faster.

Here are the recipes:

Hershey's "Perfectly Chocolate" chocolate cake
recipe from Hershey's

Ingredients:

2 cups sugar
3/4 cup Hershey's Cocoa (unsweetened)
1-1/2 teaspoons baking soda
2 eggs
1/2 cup vegetable oil
1-3/4 cups all-purpose flour
1-1/2 teaspoons baking powder
1 teaspoon salt
1 cup milk
2 teaspoons vanilla extract
1 cup boiling water

Directions:

1. Heat oven to 350°F. Grease and flour two 9-inch round baking pans.

2. Stir together sugar, flour, cocoa, baking powder, baking soda and salt in large bowl. Add eggs, milk, oil and vanilla; beat on medium speed of mixer 2 minutes. Stir in boiling water (batter will be thin). Pour batter into prepared pans.

3. Bake 30 to 35 minutes or until wooden pick inserted in center comes out clean. Cool 10 minutes; remove from pans to wire racks. Cool completely. 10 to 12 servings.

VARIATIONS:

CUPCAKES: Line muffin cups (2-1/2 inches in diameter) with paper bake cups. Heat oven to 350°F. Fill cups 2/3 full with batter. Bake 22 to 25 minutes. Cool completely. Frost. About 30 cupcakes.


Buttercream Frosting
Recipe from My Baking Addiction blog

Ingredients:

3 sticks unsalted butter, softened
pinch of fine grain sea salt
1 tablespoon clear vanilla extract
2 pounds confectioners’ sugar (powdered sugar), sifted
4-6 tablespoons heavy cream or milk

Directions:

1. In a large mixing bowl, cream butter until fluffy. Slowly add in confectioner’s sugar, and continue creaming until well blended.

2. Add salt, vanilla, and 3 tablespoons of heavy cream or milk. Blend on low speed until moistened. Add an additional 1 to 3 tablespoons of heavy cream or milk until you reach the desired consistency. Beat at high speed until frosting is smooth and fluffy. Makes enough to frost about 24 to 30 cupcakes depending on how generous you are with the frosting, OR one 9 inch layer cake.

Notes: this was the easiest recipe ever!
I used gel dyes specifically to color frosting. I wanted it to turn out more pink than that so next time I will get a brighter pink.


On a crafty/sewing note...I have been taking a small break from from sewing machine. It's not that I'm mad at it or anything and I'm sure it misses me but I've been busy job hunting, and cooking, and baking and playing with my adorable niece Emma. I did however a couple of weeks ago, made a small visit and made my mom an awesome table runner. It was inspired by the tutorial over at The Purl Bee they have this Thanksgiving Appliqued and Quilted Table Runner. My mom used to have this cream really formal and not cute runner so I decided to make her one, I used linen and cotton. I put a little padding so that it can double as a hot pad for hot plates and cups. I gotta say my skills at using bias tape to bind are getting better. I blind stitched it all the way around and I think I did a pretty good job!

I think my friends and boyfriend pretty much love me right now, I end up giving all my cupcakes away for taste testing purposes, oh and so that I don't end up eating them all!

Sunday, January 16, 2011

simple solution

Since my sewing/craft area is located in my bedroom, I don't have much room for a full size ironing board or cutting table. I usually use one of those small tables/tv trays, I put a towel and then my cutting mat on top worked out for me. I can iron when I want and cut when I want. The only problem is the towel ALWAYS shifts and slides off and it's a little annoying to be honest. So I came up with an idea to make some sort of padded cover for the table. I measured the table, left enough for a casing for the elastic and sewed the padding. The result was perfect!


I used warm and natural batting. Four layers of it to give it good padding.


It's working out great I don't have to worry about it sliding off taking all my work with it! Great for when you have to use everything in your room/area for more than one purpose :)

Sunday, January 9, 2011

cupcake stuff


I think I'm going a little crazy on the cupcakes! Oh man, but it's so fun. I wanted a reason to use my 1M tip to swirl on the frosting. I still need more practice but I think I did ok on my first time. I was reading this new blog I came across called CakeJournal and I loved one of her tips for making your own color sprinkles using any type of white sprinkle. I followed her directions HERE and made my own. I love this idea because you can make as little or as much as you want.


I was at the cake supply store and bought some packaging for the cupcakes and found the best containers! They were pretty cheap too. Not sold on the white box it looks cute but I think they would move around and mess up the frosting in travel but the clear plastic ones are awesome!


Next up I'm going to try making the cake mix from scratch using some great recipes, like Martha Stewart's tiramisu cupcake recipe wish me luck!

Tuesday, January 4, 2011

using my recipe box


So I don't really make a list of resolutions, but I do think of things I would like to do more. One of those things was to use my recipe box more. I copy down recipes but I never really end up using them. So I want to start. This morning I decided to make breakfast for me and my mom. I looked in the breakfast section of the box and found this Speedy Egg, and Cheese Stack. I really don't remember where I got the recipe from but I wanted to try it.

scrambled eggs, tomatoes, cheese, corn tortillas (you can use flour too)
all ingredients layered twice, baked at 375 for 10 to 12 minutes
I served it with cilantro and salsa

It was fast, easy, and very yummy!

Sunday, January 2, 2011

I love cupcakes!


Happy New Year!

One of my resolutions is to blog more, try new projects, and bake more! Soooo all day yesterday I baked mini cupcakes, regular cupcakes and made that lovely cupcake stand. I made milk chocolate cupcakes with cream cheese frosting yum! I think my favorite part of making cupcakes is decorating. I didn't just want to use just one type of sprinkle I used a few different kinds. I thought I would have a little photo shoot just for fun :) I collected some of my favorite teacups and my teapot and used them as props.


The other day I went to the cake and candy supply shop (which I love btw) and saw this plain white cardboard Wilton cupcake stand. I already own a metal one and and a plastic one but wanted to make my own and got inspired by one I saw online in a blog. I can't really remember where I saw it but it made in impression on me. I used some pretty scrapbooking paper, double sided tape or tags, and the plain cupcake stand. I just traced the parts and taped them and assembled the stand. I added some words to give it more whimsy. It was actually fun and easy.


Then I saw THIS tutorial over at Birds Party Blog and knew I had to make my own. I bought some heavy card stock in some pretty prints, downloaded the template, traced on the card stock, cut, glued (I used my handy glue gun for faster drying purposes) and I came up with these:


I also got the little strawberry cake topper from Paperglitter. If you go to her blog there's a place for FREE PRINTABLES, you can choose from a variety of cute cupcake toppers. I chose the strawberry, perfect for my set up.


Loved setting up my little cupcake shoot! It was something I've wanted to do for a while. Now off to eat some of those yummy cupcakes :)